
Gun and shooting enthusiasts love the classic, reliable red dot sight. Whether you’re into guns and gun mods or not, you’ll likely know about this optic from games or movies. It’s popular, and if you’re an enthusiast, you’ll probably want to have at least one in your collection.
The main reason they’re so popular is that they are designed to simplify most aspects of shooting your AR-15. Offering quicker and easier transitions from target to target, excellent peripheral sight, and simple installation, the red dot sight has quickly become a staple.
However, these are only aspects you can begin to enjoy once you’ve got a bit of experience under your belt, and experience comes with use. Unfortunately, that means you’ll have to fiddle around and figure out how best to mount the sight first. Luckily for you, we’re here to help.
Read below for advice on how and where to mount your red dot sight on your AR-15!
How Far Back Should You Go?
Red dot sights are among the most versatile sights and can be fitted to almost every modern gun design. Moreso, they have the excellent characteristic of having unlimited eye relief, so you can experiment with where exactly you mount your sight. It is designed so that the little red dot reticle and your target will remain the same size no matter where you put it on the rail.
This means that the mounting process is very simple. All you need to do is mount your sight, zero it for accuracy, and then get to shooting.
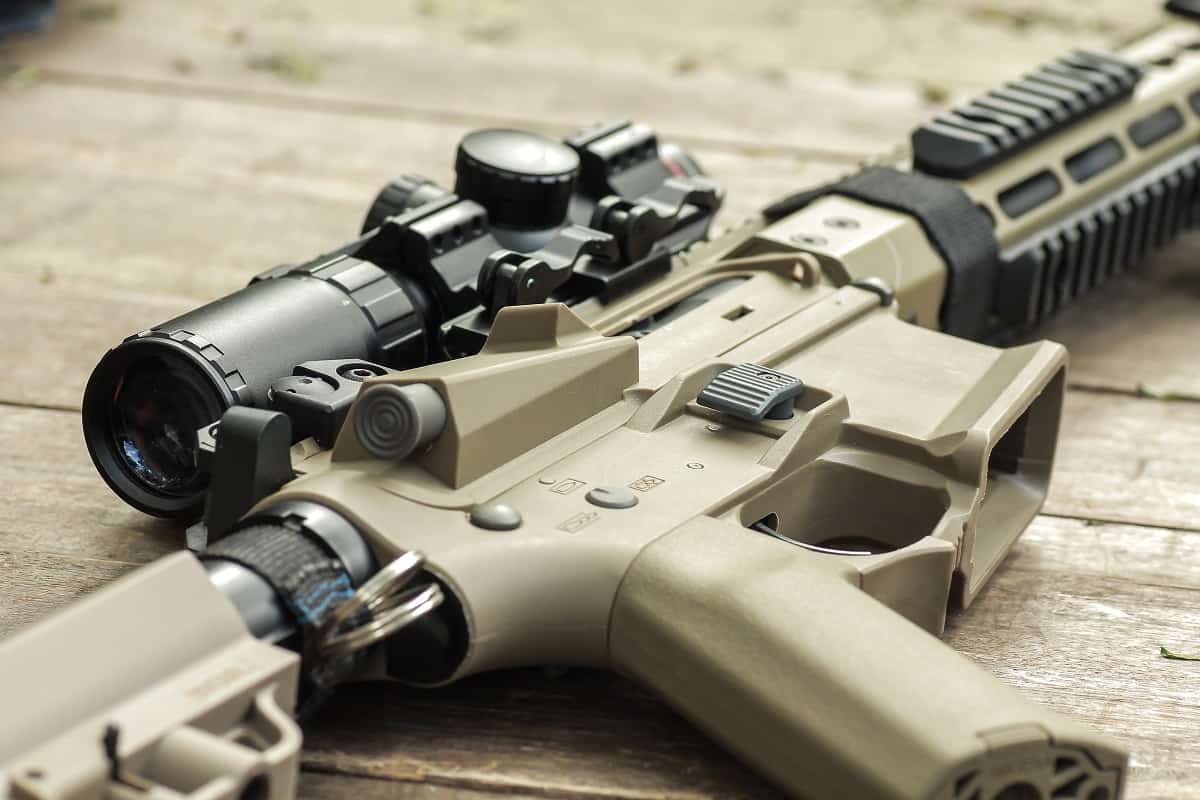
The most common platform for red dot sights is on long guns. These include rifles, shotguns, and pistols that are more rifle-like in design. These also include the AR-15, which we are looking at today.
You’ll most likely have a Picatinny or similar rail, as these are the most common types of rails across the board for long guns like the AR-15. Similar to the red dot sight, the Picatinny is one of the most versatile and universal rails, and it can be installed on any gun that can support it.
Do you remember that unlimited sight relief we mentioned earlier? This means that you can install your red dot sight wherever you want on your rail as long as it’s forward of your cheek weld. For those who do not know, this is the action of placing your cheek against the buttstock’s comb to help maintain accuracy.
Now that we have a point of measure of how far back we should go – not past your cheek weld – let’s start mapping out some points along the rail that you can experiment with.
Places To Consider
Most modern rifles support rails long enough to extend from the receiver to the end of the barrel or as close as possible. This means we’ve got quite the space to work with when looking for points to install our red dot sight.
For a beginner, many experienced shooters recommend mounting the red dot sight above the receiver. This is because modern rails can have some flex to them, causing them to vibrate quite a bit while shooting. With your sight closer to the receiver, you can help minimize these vibrations so that your zero is more accurate.
Generally, going forward beyond the receiver is a bad idea. The further away from the receiver you go and the closer you get to the barrel, the more flex you’ll experience on the rail and the less accurate you will be. On other take-down guns, it may make sense to mount the sight closer to the barrel for more precise shots, but it is ill-advised for our purposes.
However, it isn’t always possible to mount the sight above the receiver, such as when using additional attachments or mods that would come before the red dot sight. In this case, you should still be mounted close enough to the receiver to help maintain accuracy but not close enough to create any discomfort.
The sweet spot that many seem to enjoy is right above the ejection port for the reasons we’ve covered above. It will allow you to maintain accuracy and balance when shooting without necessarily sacrificing space for attachments such as a magnifier, or zoom, as some call it.
Zeroing
We’ve mentioned it a few times before, so let’s briefly talk about zeroing. This is the next step after you’ve mounted your sight to your rifle. Essentially, it is making sure that your sight is accurate for the type of gun you’re going to be shooting.
You wouldn’t zero your AR-15 like you would a shotgun or pistol. For a red dot sight on this gun and similar types, you’ll want to zero it at 50 yards, which will virtually take you out from 50 to 200 yards.
Most red dots will have two dials that control the elevation and windage. Some might have these two configurable features in one dial, so make sure you consult your manual for your specific design. These dials will work with MOA measurements most of the time, with each click representing one adjustment.
MOA represents one inch at 100 yards, and most dials will adjust in quarter-MOA increments, so one click at 100 yards is one-quarter of a movement on the dial.
Steps to Mount Your Sight
To close off this article, we’ll give you some tips and the general process of mounting your sight that should be followed. You can actually mount your sight in a few simple steps.
Firstly, you’ll want to use a threadlocker to ensure the screws of your sight and the mount do not come loose with the gun’s vibrations. Of course, we want to maintain accuracy, so ensuring that your screws are firmly in place even after several shots will ensure that you remain zeroed.
Secondly, when tightening your sight in place, push ever so slightly forward. This will ensure that your gun’s backward recoil won’t affect your optics as much. You want to keep your optics more stationary when shooting so that you stay accurate.
Final Thoughts
Hopefully, you are now more knowledgeable about how and where to mount your red dot sight, and you can now enjoy being more accurate at the shooting range!